Creative Halloween nail designs can start with something as simple as a candle drip, a lace pattern, or the curved ridges of a pumpkin. This collection turns those details into ten wearable manicure ideas, pairing each nail look with the object or texture that inspired it.
The images use a 50/50 editorial concept: a manicure on one side and its matching inspiration on the other. Follow a silver line from a nail into a spiderweb, or notice how copper chrome echoes a glowing pumpkin. You can take the nail design itself to your appointment; the matching object helps explain the colors, finish, and artwork.
For a wider range of seasonal styles, explore our Halloween nails guide. Here, the focus is on coordinated details that give familiar spooky motifs a fresh look.
Table of Contents for Creative Halloween Nail Designs
Table of Contents
What Makes These Creative Halloween Nail Designs Different?
Each manicure has one clear source of inspiration. Instead of combining every Halloween symbol in a single set, these designs repeat a small selection of colors and shapes. That gives the accent artwork room to stand out.
Most of the collection uses medium almond nails, which provide space for curved lines and delicate details. You can also simplify the looks for shorter nails: keep the main polish color, choose one accent, and reduce the number of lines. The goal is a recognizable detail that suits the nail length you actually enjoy wearing.
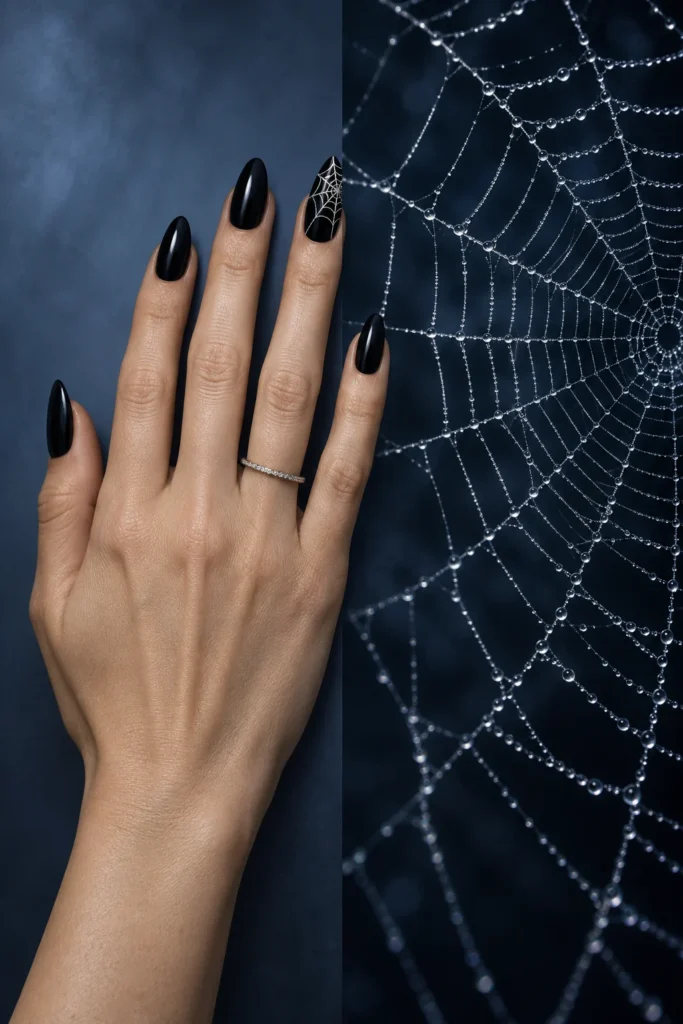
1. Silver Spiderweb × Midnight Web
Glossy black almond nails one of the most Creative Halloween Nail Designs create a striking base for a fine silver spiderweb. The index accent carries the artwork, while the remaining nails stay black for a clean, balanced finish.
Beside the manicure, a silver-lit web reveals the inspiration behind those delicate lines. The connection works because both surfaces share the same curved strands and cool highlights.
Ask for thin, separated web lines with visible black space between them. Heavy silver strokes can quickly overwhelm the accent. One slim silver ring complements the look without competing with it.
For a shorter version, place a small web in one corner of the nail instead of covering the whole surface.
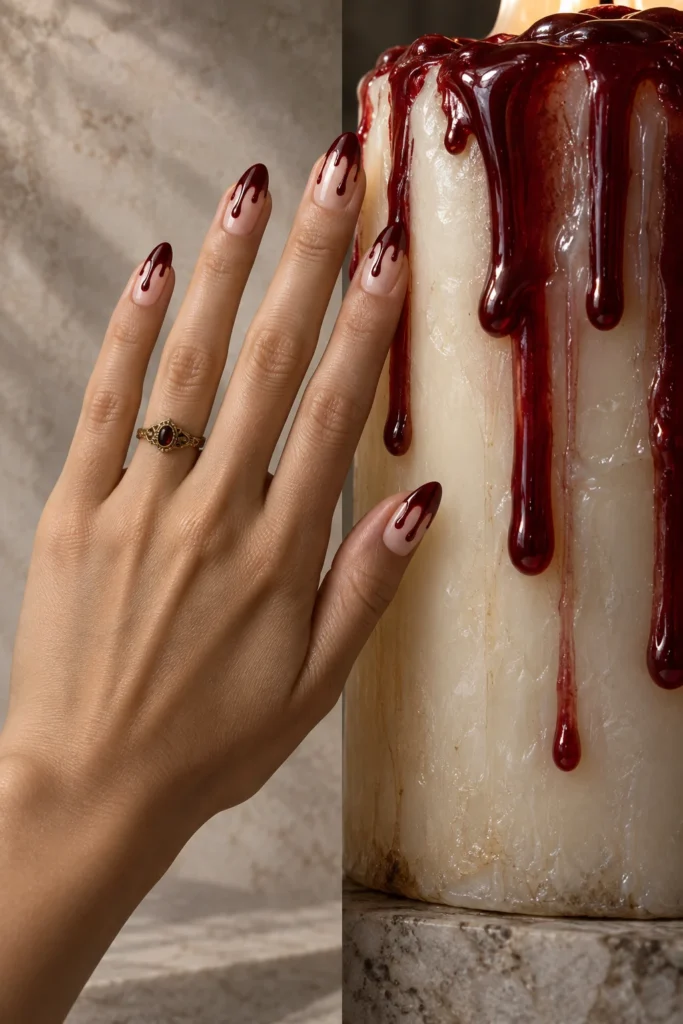
2. Vampire Drips × Burgundy Candle Wax
A sheer nude base and slender oxblood drips give this manicure its gothic character. The red is deep and wine-toned, with glossy reflections that echo burgundy wax running down an ivory candle.
Each nail has slightly different drip placement. Some trails are longer, while others stop near the edge, leaving plenty of the nude base visible. That variation keeps the set from looking like the same stamp repeated five times.
Ask your nail artist for small, rounded drip ends and controlled lines. The artwork represents red polish, and the candle pairing emphasizes its decorative quality.
Choose this look when you want recognizable Halloween nail art with a restrained color palette.
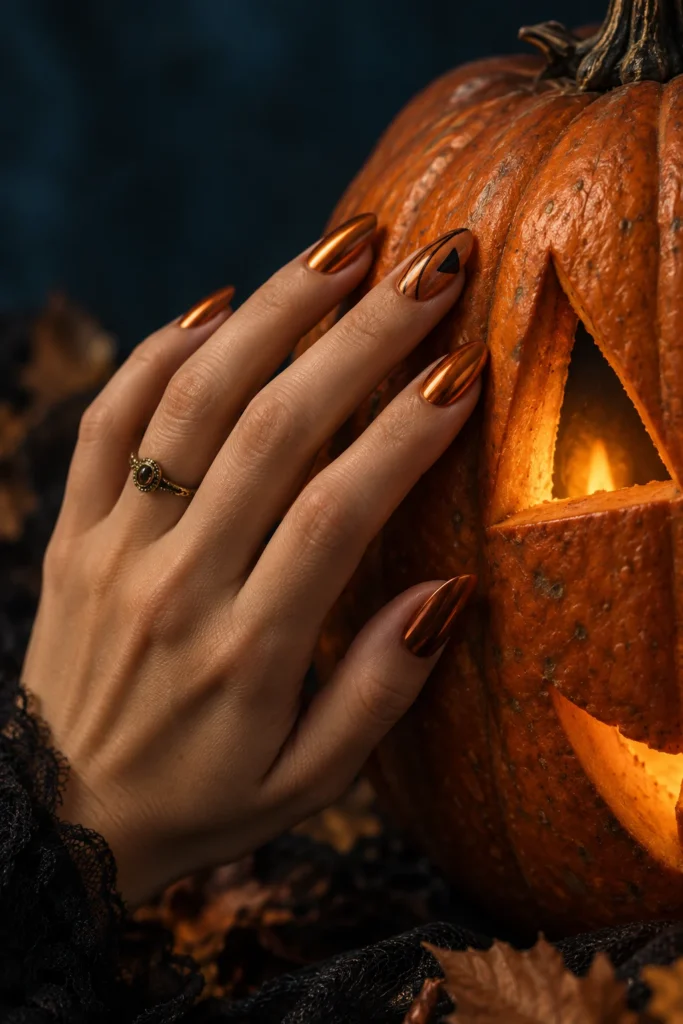
3. Copper Pumpkin Nails × Glowing Jack-o’-Lantern
Reflective copper-orange chrome brings a polished finish to classic pumpkin colors. The index nail adds fine burnt-umber curves and a small black triangle, borrowing just enough detail from a jack-o’-lantern to make the theme clear.
The accompanying pumpkin close-up shows how those curves relate to real ridges. Its warm glow also echoes the bright reflections in the copper polish.
Keep the other nails simple so the pumpkin accent remains easy to read. A slender antique-gold ring works naturally with the warm tones.
If you prefer a softer finish, use glossy burnt orange instead of chrome. For more variations on this theme, browse our pumpkin nails ideas.
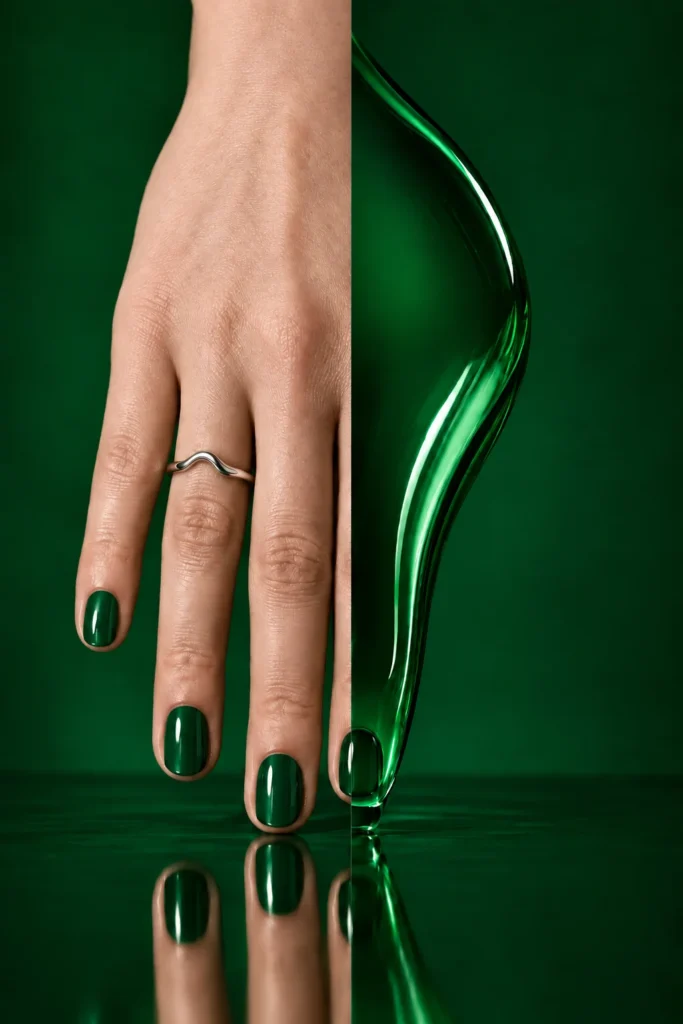
4. Emerald Cat-Eye × Witch’s Potion
Blackened emerald cat-eye polish gives this design its depth. A curved green highlight runs across the nails, recalling liquid swirling inside a glass potion bottle.
The strongest detail is the luminous band on the index nail. It gives the manicure a focal point without needing a painted witch, hat, or cauldron. The bottle image makes that connection visible through matching curves and reflections.
Bring the reference to your nail artist and ask for a deep emerald base with a clearly defined magnetic highlight. Keep extra glitter and embellishments minimal so the cat-eye effect remains the main feature.
This is a good choice if you want a witchy manicure that also works beyond Halloween.
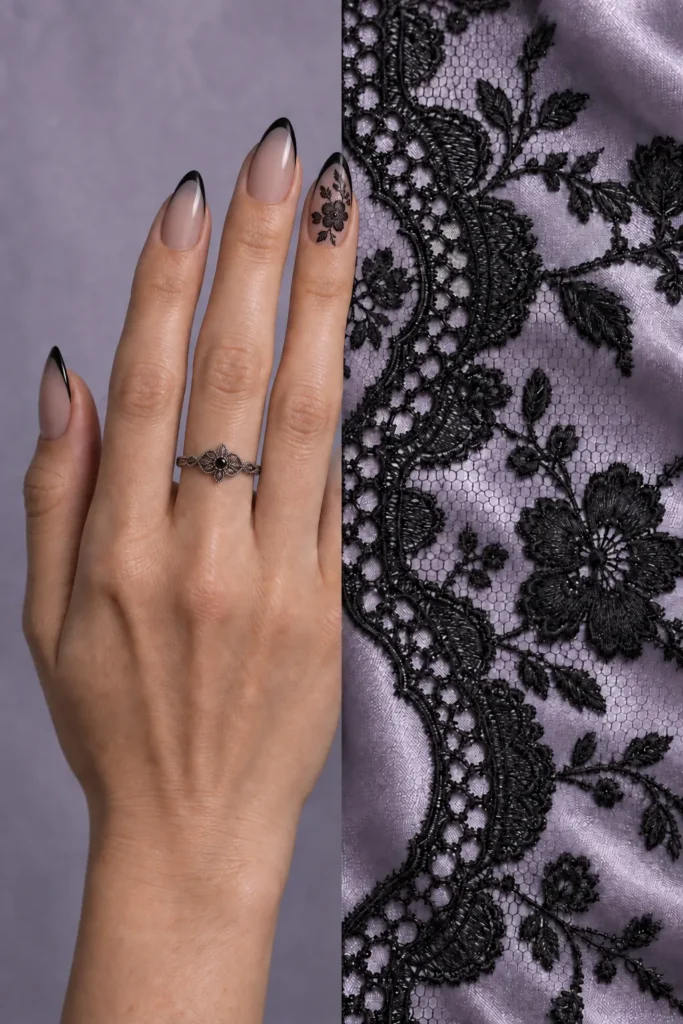
5. Gothic Lace Nails × Black Lace Macro
A translucent smoky-nude base, fine black French edges, and one lace accent make this a softer gothic option. The pattern combines a small floral detail with a scalloped curve rather than filling every nail with dense decoration.
The lace photograph beside the hand reveals the tiny openings and threads behind the painted motif. Those open spaces matter: they help the nail artwork look delicate.
Ask for the lace on one accent nail, especially if your nails are short. The rest of the set can stay sheer with narrow black tips.
A fine oxidized-silver ring completes the look. It pairs especially well with an outfit that already includes lace or satin.
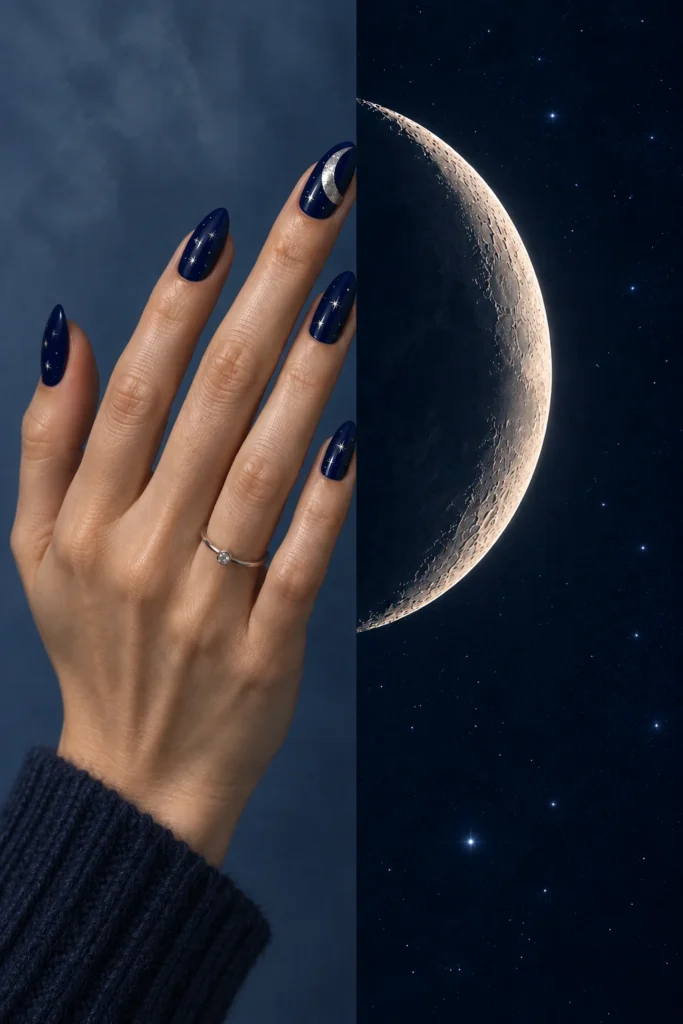
6. Haunted Moon Nails × Silver Lunar Crescent
Midnight navy nails, scattered silver stars, and a crescent accent create a quiet celestial version of Halloween. The moon photograph highlights the curved shape and textured silver finish that inspire the nail art.
Keep the stars sparse. Leaving dark space around them makes the crescent easier to see and gives the manicure a calmer appearance.
For the accent, choose a slender crescent that follows the side of the nail. It does not need to be perfectly centered to look intentional.
These creative Halloween nail designs suit anyone who prefers mysterious nighttime details to pumpkins or ghosts. The navy-and-silver palette can also carry into a winter manicure.
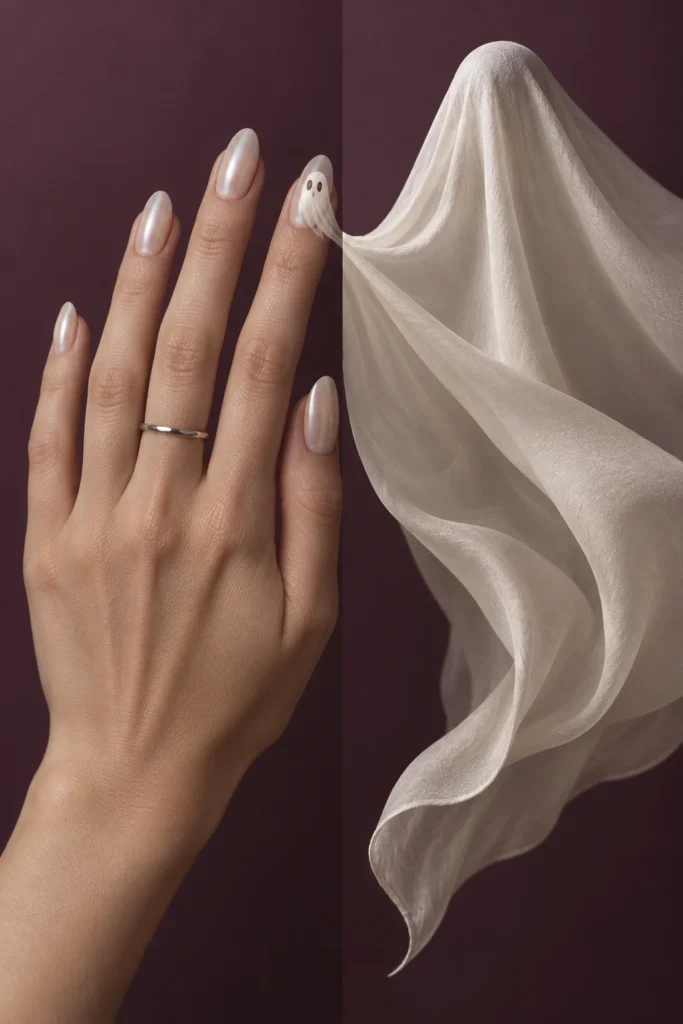
7. Pearl Ghost Nails × Floating Ivory Silk
Milky pearl nails give this ghost design a light, gentle finish. One tiny ivory ghost appears on the index nail, with two charcoal eyes and a tapered outline that echoes flowing silk.
The fabric pairing adds movement to an otherwise minimal manicure. Its folds suggest how to shape the ghost’s lower edge without adding complicated decoration.
Make sure the ghost is slightly more opaque than the base so its silhouette stays visible. Keep the eyes small and leave the other nails pearlescent.
This is one of the softer looks in the collection. For short nails, simplify the ghost into a rounded white shape with a small curved tail.
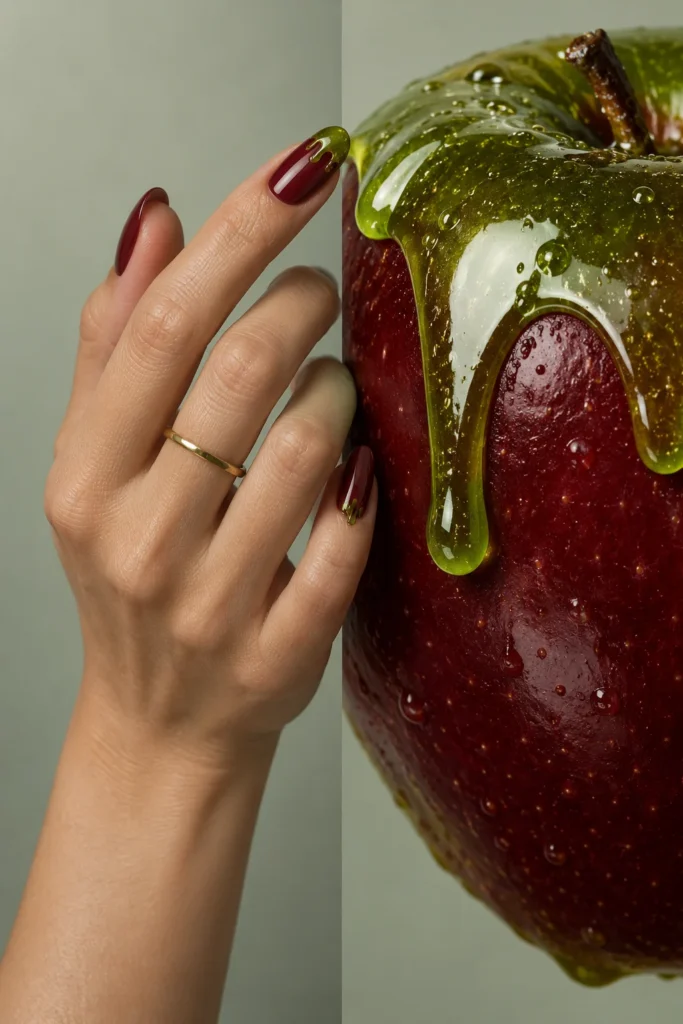
8. Poison Apple Nails × Green Candy Glaze
Deep wine-red polish and translucent acid-green drips create a bold contrast. The apple pairing makes the color story immediately clear: glossy red skin beneath a bright green candy coating.
The index nail carries the main green detail, with a smaller echo on the ring nail. The other nails remain red, giving the brighter accents space to stand out.
Ask for a compact drip near the tip rather than a large green section covering the nail. That keeps the wine-red polish central to the design.
Choose this manicure if you enjoy darker red nails but want a playful Halloween update. A slim antique-gold ring adds warmth to the combination.
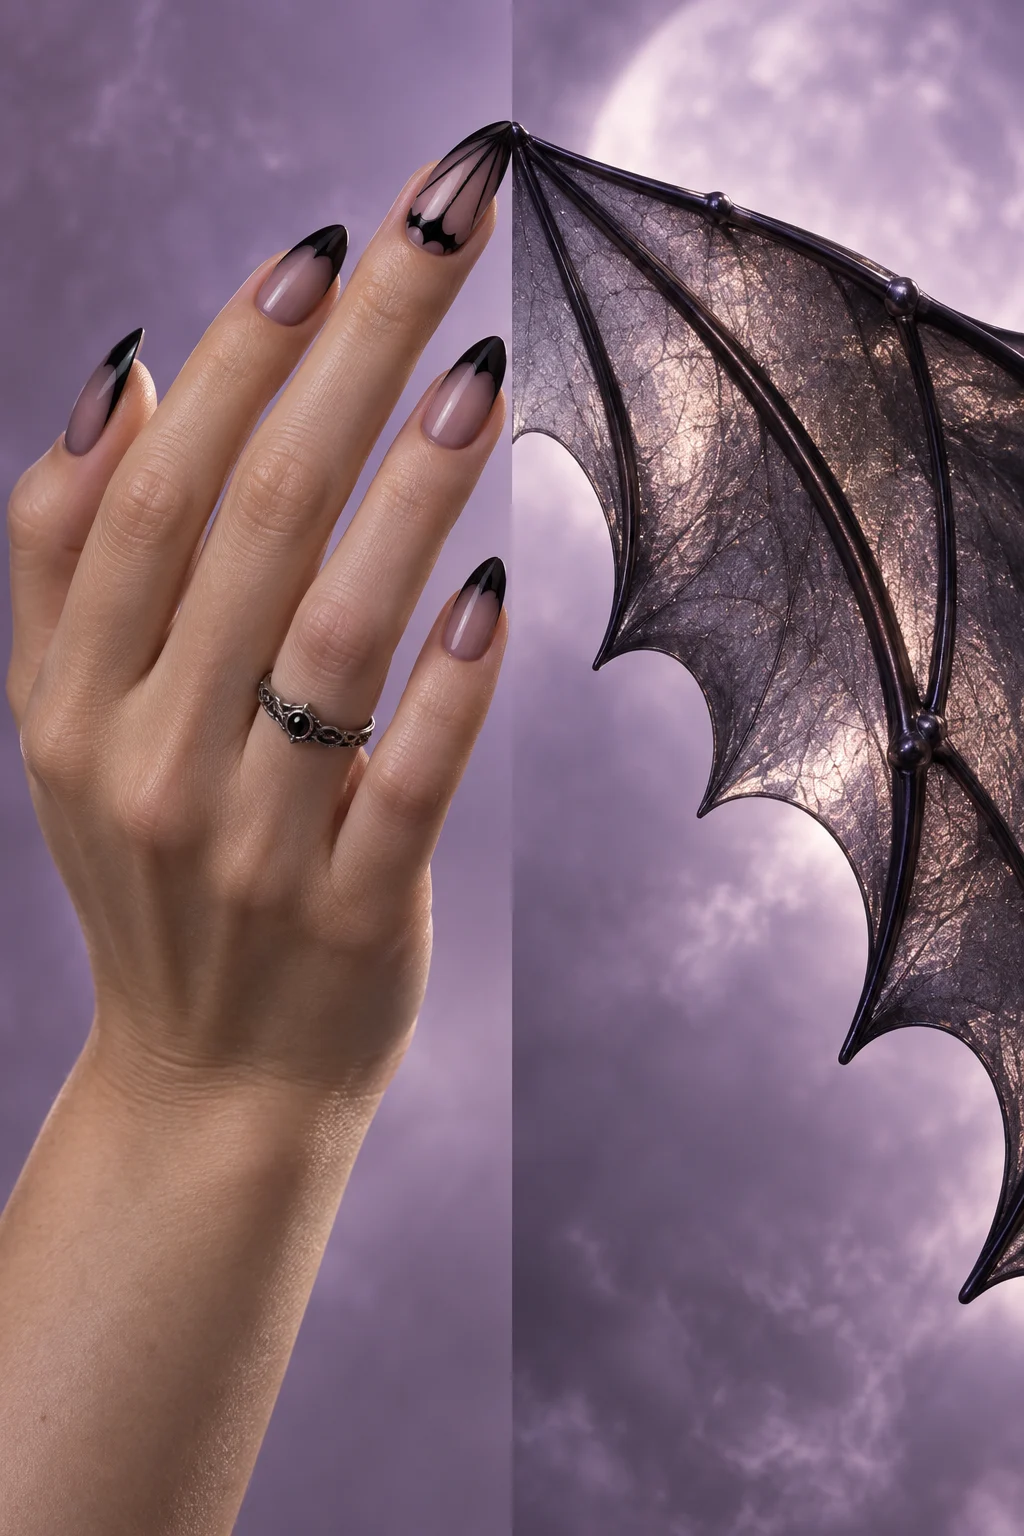
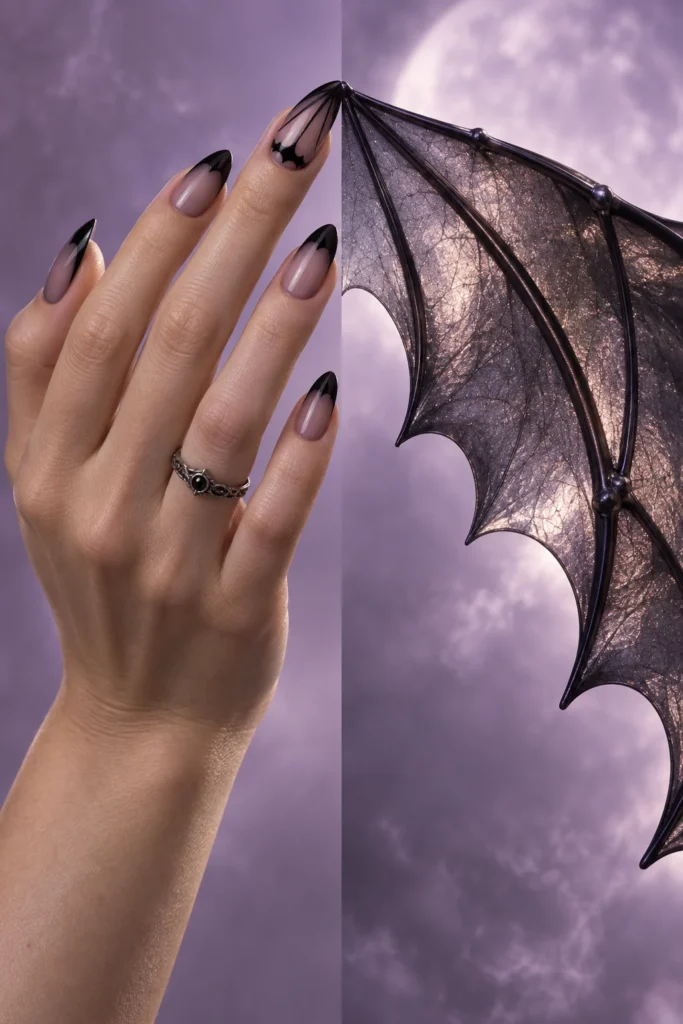
9. Black Bat-Wing Nails × Sculpted Bat Wing
This look reshapes the black French tip into a bat-wing scallop. A sheer smoky-mauve base keeps the curved edges visible, while fine lines on one accent nail suggest the structure of a wing.
The sculpted wing beside the manicure shows the relationship between the scalloped edge and its supporting ribs. It is a graphic interpretation of a bat, with the focus on shape.
Keep the scallops small enough to follow the nail tip. Oversized points can make the design look crowded, particularly on shorter nails.
Ask for a simplified version with one or two shallow curves if you prefer a subtle result. The black-and-mauve palette keeps the set easy to coordinate.
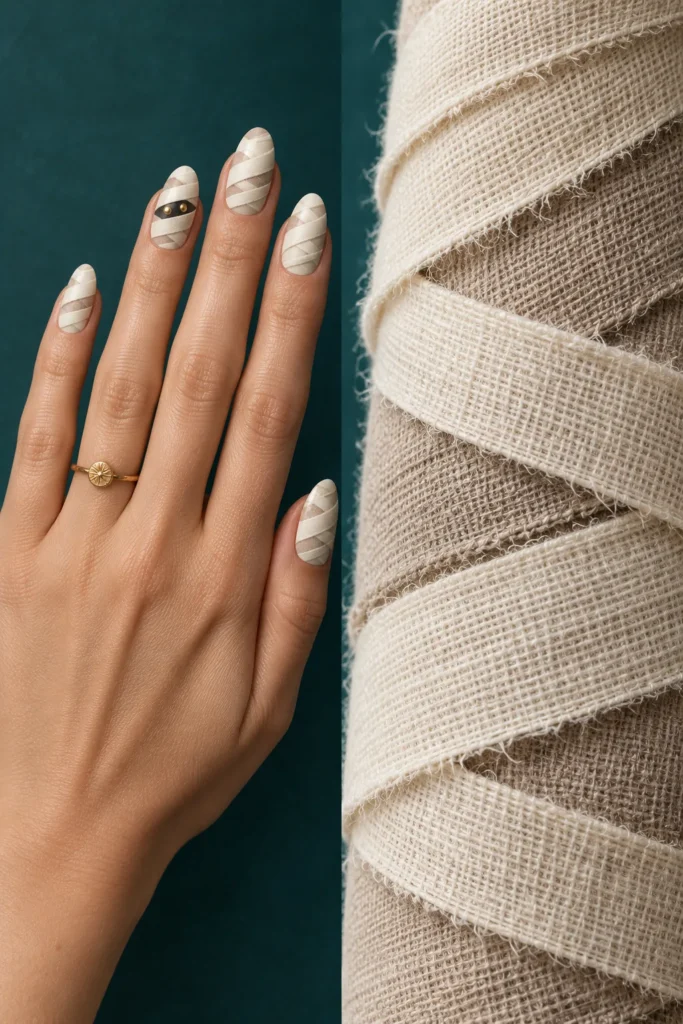
10. Mummy Wrap Nails × Antique Linen
Creamy ivory nails become miniature mummy wrappings through overlapping warm-white and pale-taupe bands. A narrow charcoal gap with two tiny gold dots gives the index accent its playful character.
The antique linen photograph supplies the color palette and diagonal direction. You do not need actual texture on the nails: the layered effect can come from carefully placed painted strips.
Use gentle shade differences so the bands remain visible without turning the manicure into a high-contrast stripe pattern. Keep the small eye detail on one nail.
This is a useful option for anyone who prefers neutral polish. Short squoval nails can carry a simplified version with fewer diagonal bands.
How to Choose Your Creative Halloween Nail Designs
Start with the finish you already like wearing. For glossy dark polish, consider Silver Spiderweb or Poison Apple. If you enjoy reflective effects, Copper Pumpkin and Emerald Cat-Eye give you two very different color directions.
For a softer palette, Pearl Ghost and Mummy Wrap keep the artwork light. Gothic Lace and Black Bat-Wing offer variations on a dark French manicure, while Haunted Moon centers on a small celestial accent.
Save the image that best communicates your preferred color and detail. At your appointment, explain which parts you want to keep and which you would like simplified for your nail length. The prop belongs to the inspiration photograph; the manicure should work beautifully on its own.
Frequently Asked Questions
Can these Creative Halloween Nail Designs work on short nails?
Yes. Keep the main colors and reduce the artwork to one clear detail. A corner web, small ghost, crescent, or a few mummy bands can preserve the theme without needing the full medium-almond layout.
Do all ten designs need chrome or magnetic polish?
No. Copper Pumpkin uses a chrome finish, and Emerald Cat-Eye relies on a magnetic effect. The other looks focus on painted details over glossy, sheer, or pearlescent bases. You can also reinterpret the copper design with ordinary glossy orange polish.
How can I keep my Halloween Manicure Fresh ?
Apply cuticle oil regularly and wear gloves when your hands will be exposed to water or cleaning products for extended periods. Avoid using stiletto or almond extensions to open containers, scrape surfaces, or pry objects.
The American Academy of Dermatology’s nail-care recommendations include keeping the nails clean and dry, filing snags promptly, and avoiding unnecessary cuticle cutting.
If gel polish begins lifting, arrange proper removal instead of peeling it away. This helps protect the natural nail underneath your Halloween manicure.